Last month our team added some feature enhancements to help you better manage your business. Continue reading to find out more on last month’s enhancements.
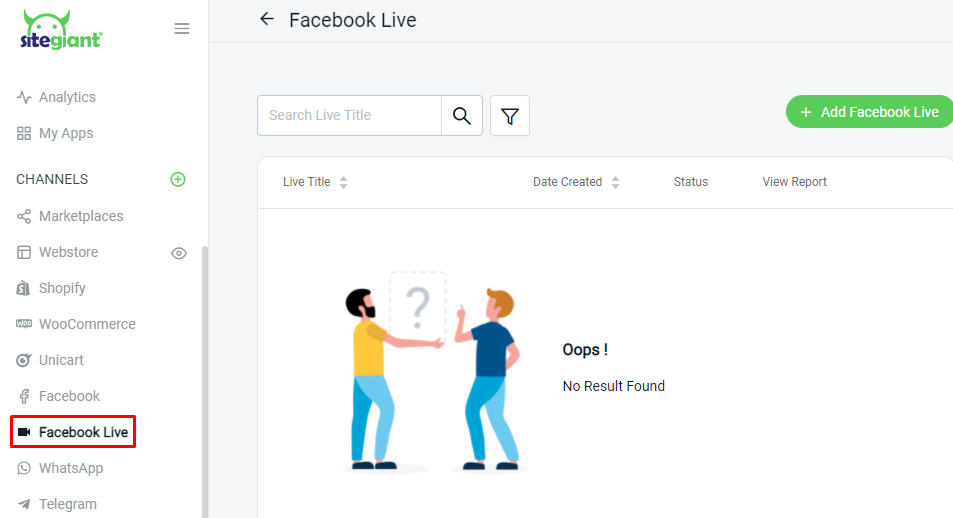
1. Facebook Live
**Note: This feature is only available for Starter plan and above.
Facebook Live is now available for use. Connect and start selling through Facebook Live.
**Note: This feature is only available for Value Plus plan and above.
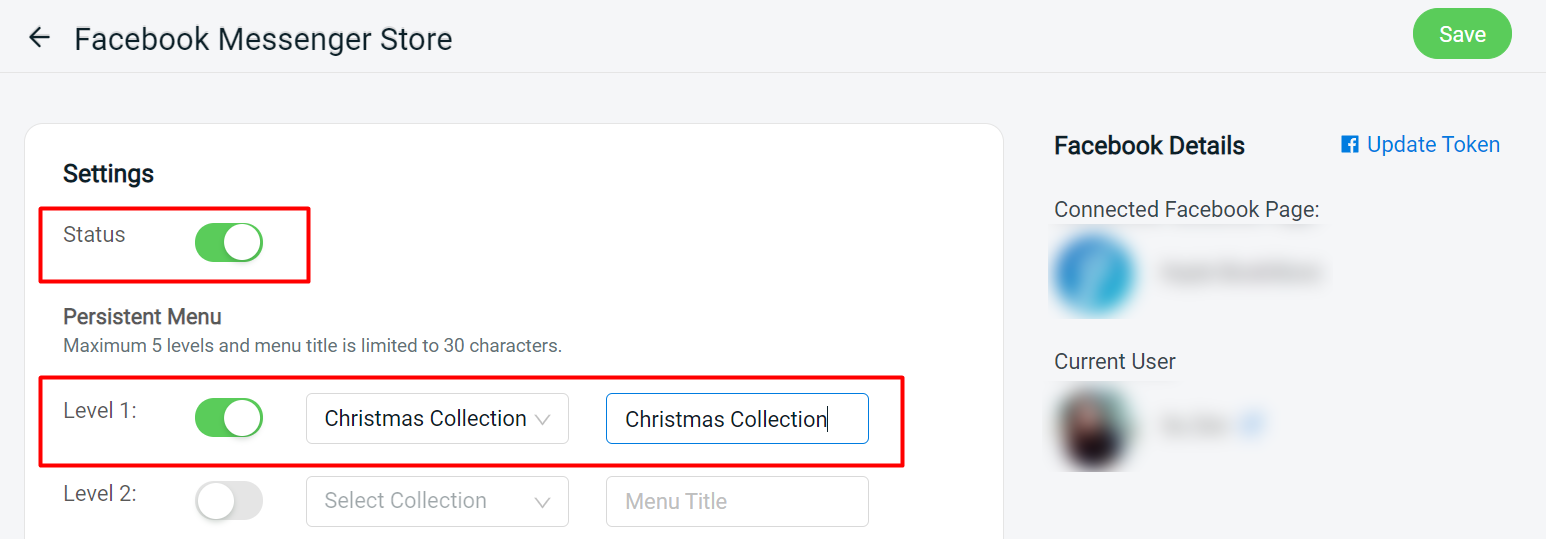
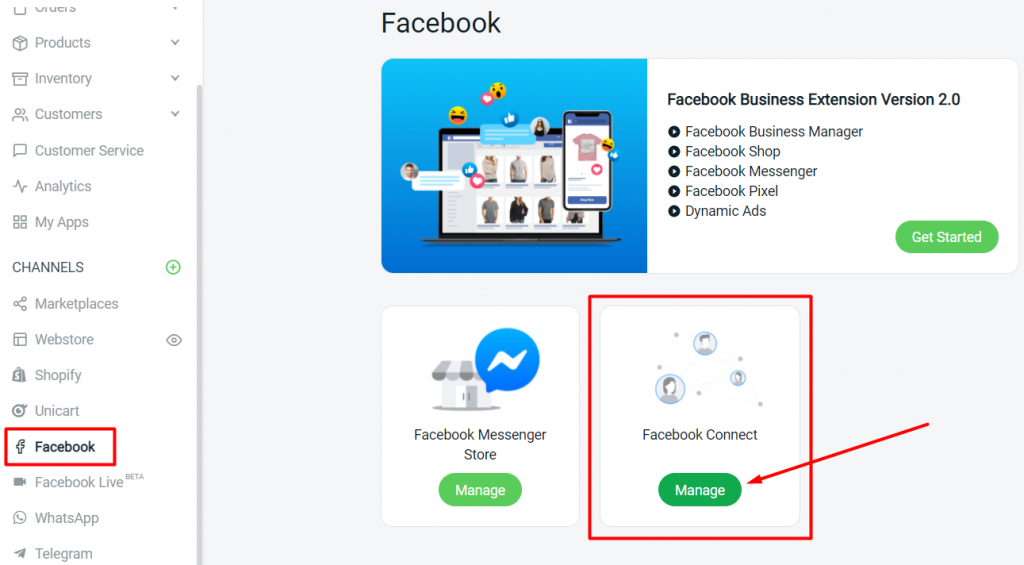
You may now enable Facebook Messenger Store to allow your customers directly shop and purchase products all through Facebook Messenger.
How to enable Facebook Messenger Store?
Step 1: To set up, head over to Facebook > Facebook Messenger Store.
Step 2: Ensure your Facebook page token is updated and you may proceed to insert the product catalogue. Then, enable the status and save to allow customers to start purchasing through Facebook Messenger.
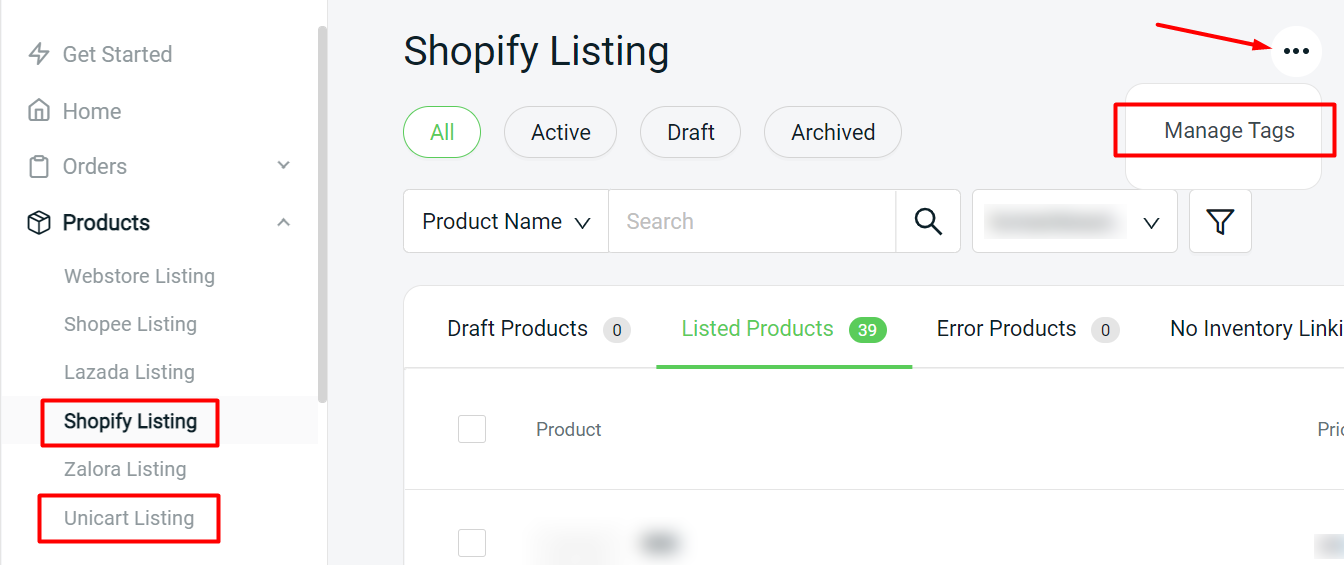
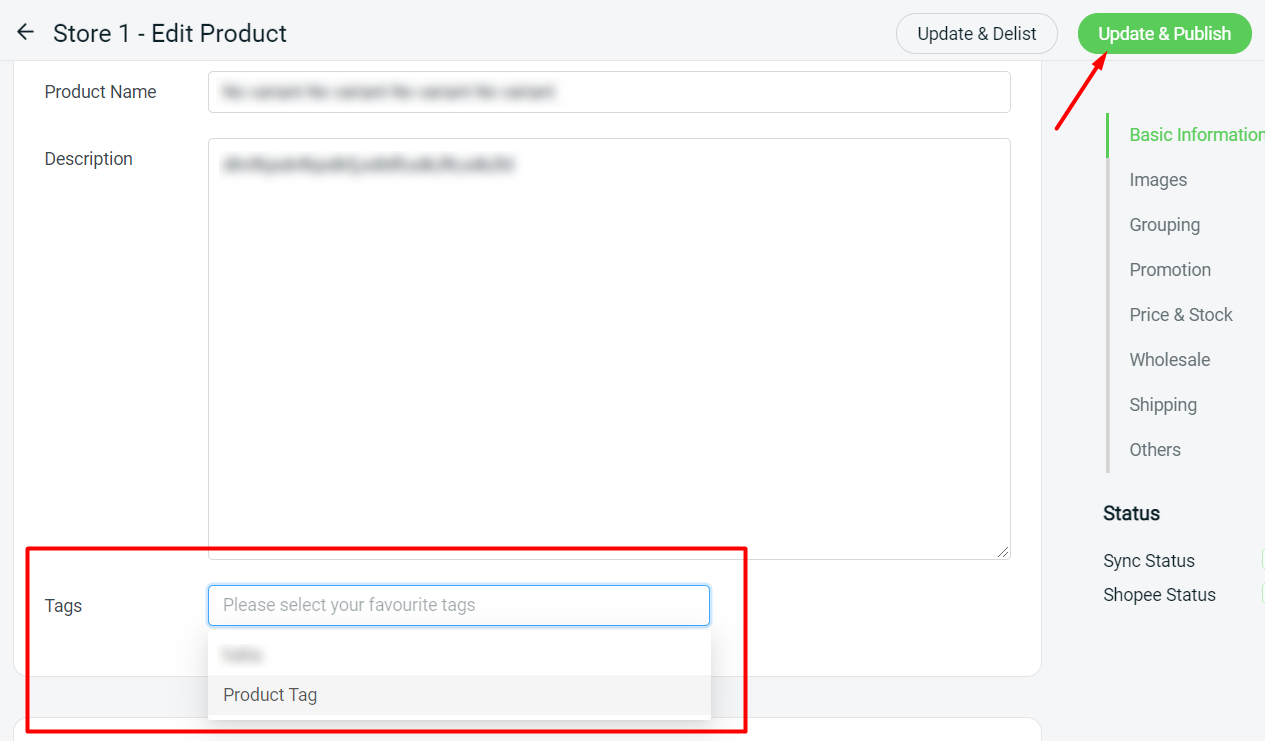
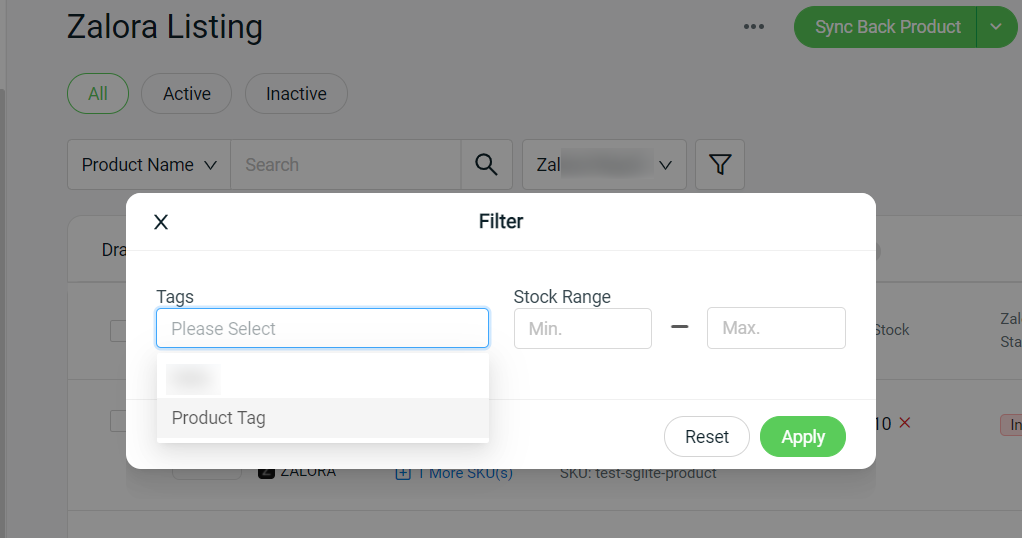
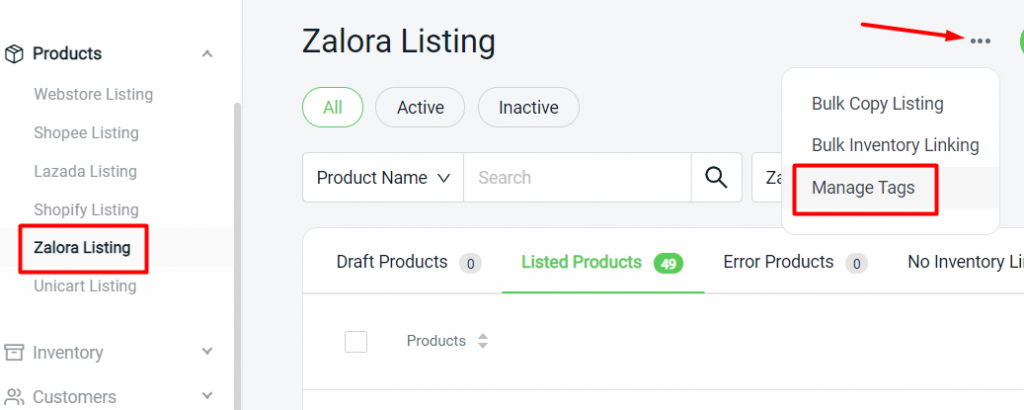
3. Product Tag for Shopify & Unicart Listing
You may now use the product tag feature that is available in Shopify and Unicart listing for convenient product filtering in SiteGiant.
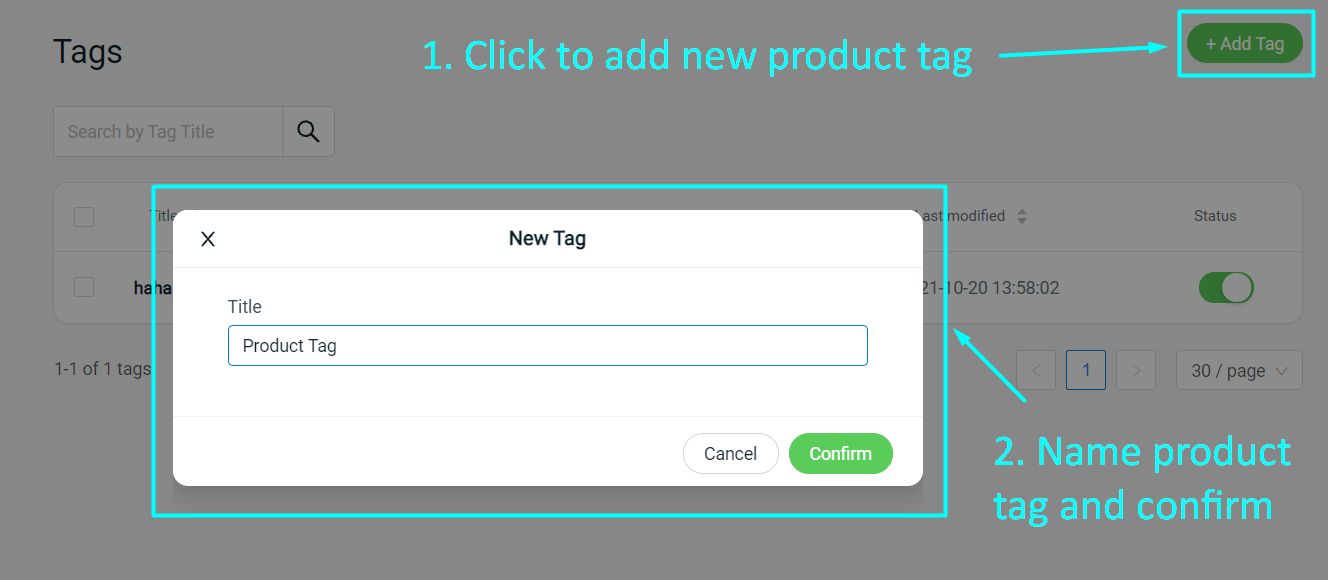
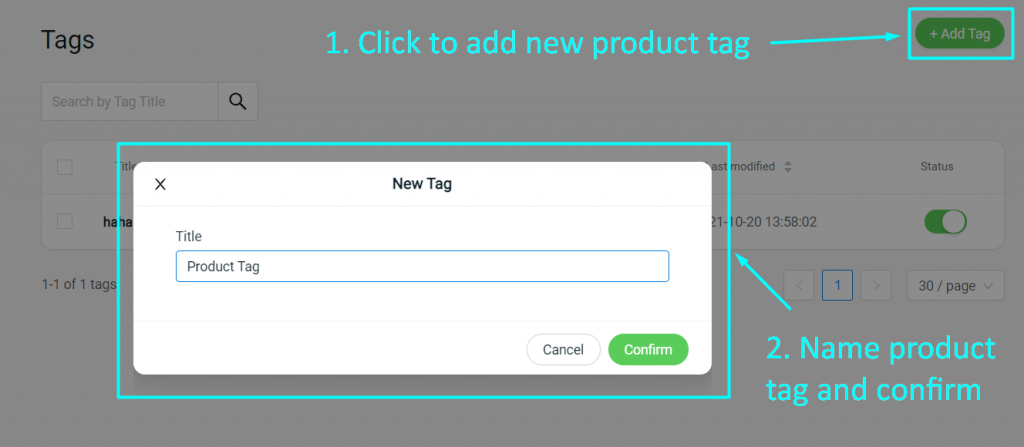
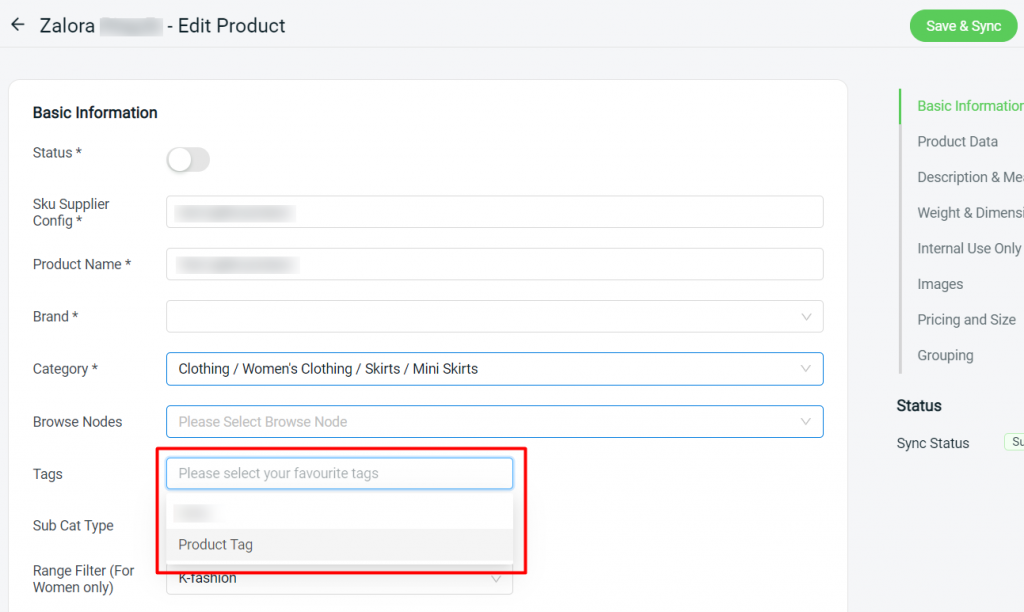
How to create and assign product tag?
Step 1: Create tag under Shopify/Unicart listing > Setting > Manage Tags.
Step 2: Name and save product tag.
Step 3: Assign product tag under product detail page.
Filtering Shopify/Unicart product listing by tag
4. Delivery Order Template
You may now customize your Delivery Order document.
How to customize delivery order?
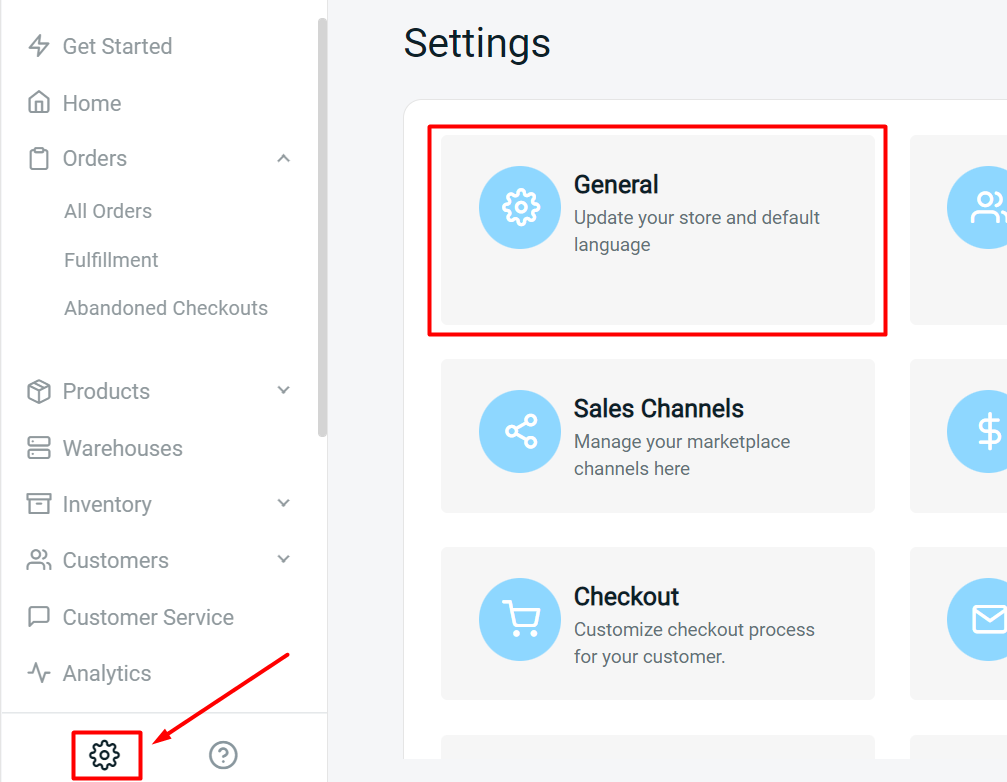
Step 1: Navigate to Settings > General.
Step 2: Then, head over to Document Template > Delivery Order > Edit icon to customize.
Step 3: The printing of Delivery Order can be done under Orders > All Orders > Select order > More (…) > Print D.O.
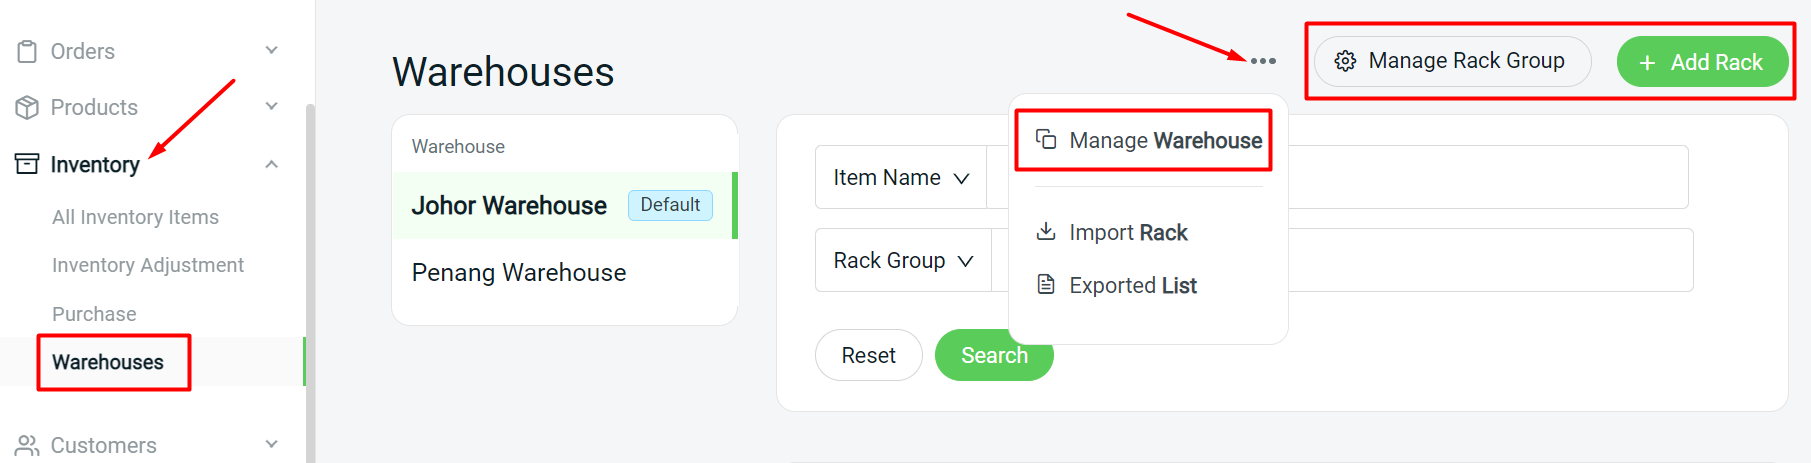
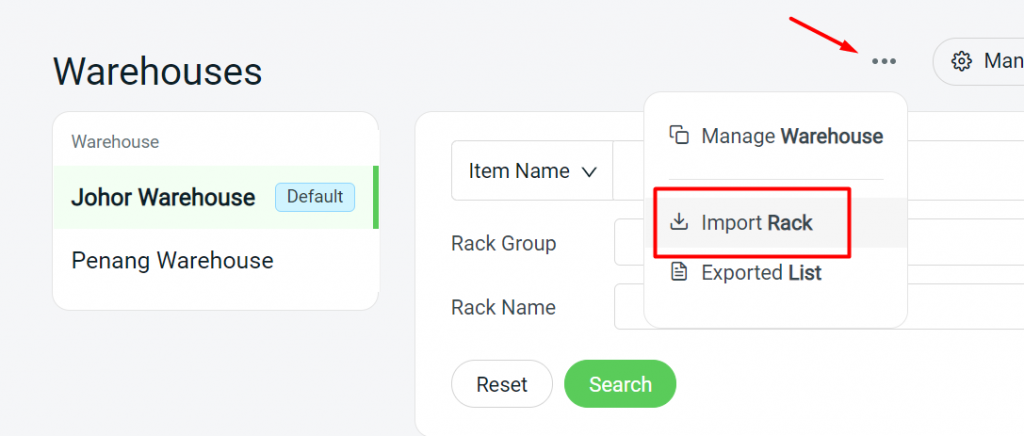
5. Warehouse Settings
Warehouse and rack have been removed from settings. You may now create/manage your Warehouse, Rack and Rack Group details under Warehouses.
Other Enhancements
a) Bulk import Rack Details with CSV file
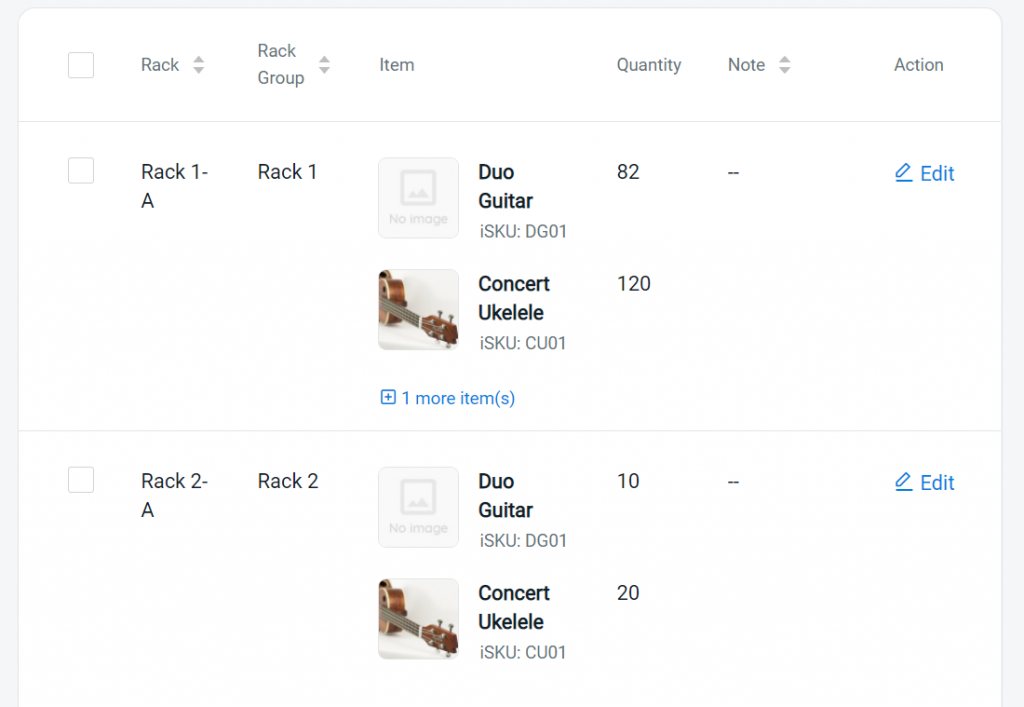
b) Enhanced Rack Interface and details
You may now identify all the items allocated to the respective rack and rack groups, view the item quantity and add notes for your reference.
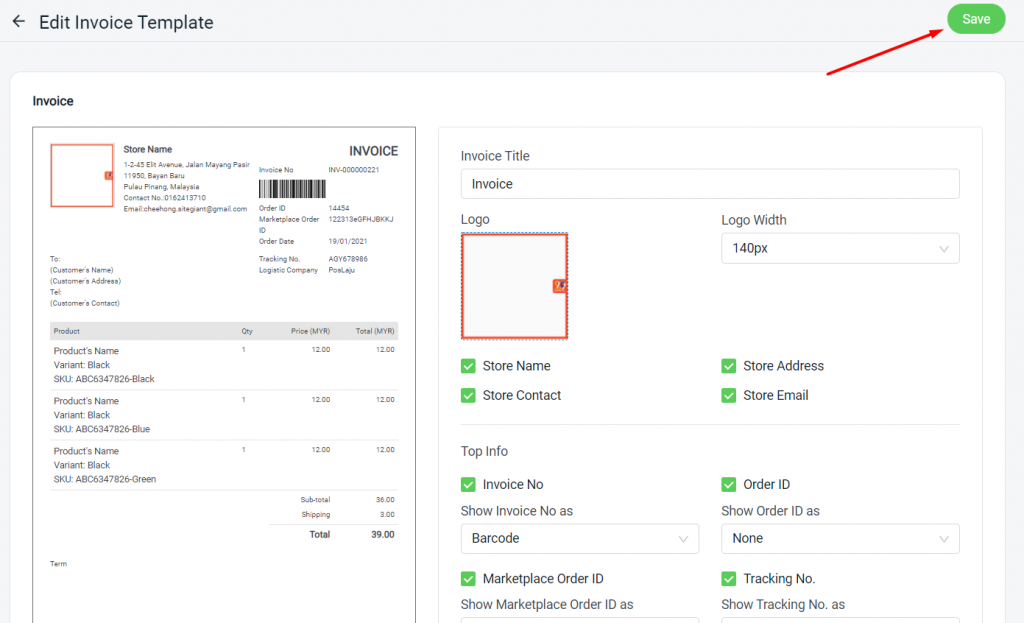
6. Invoice Template
More customization options are available for invoice template.
To customize your invoice template, navigate to Settings > General > Document Template > Invoice > Edit icon.
After customization, you may print your order invoices through the All Orders page or e-Invoice app.
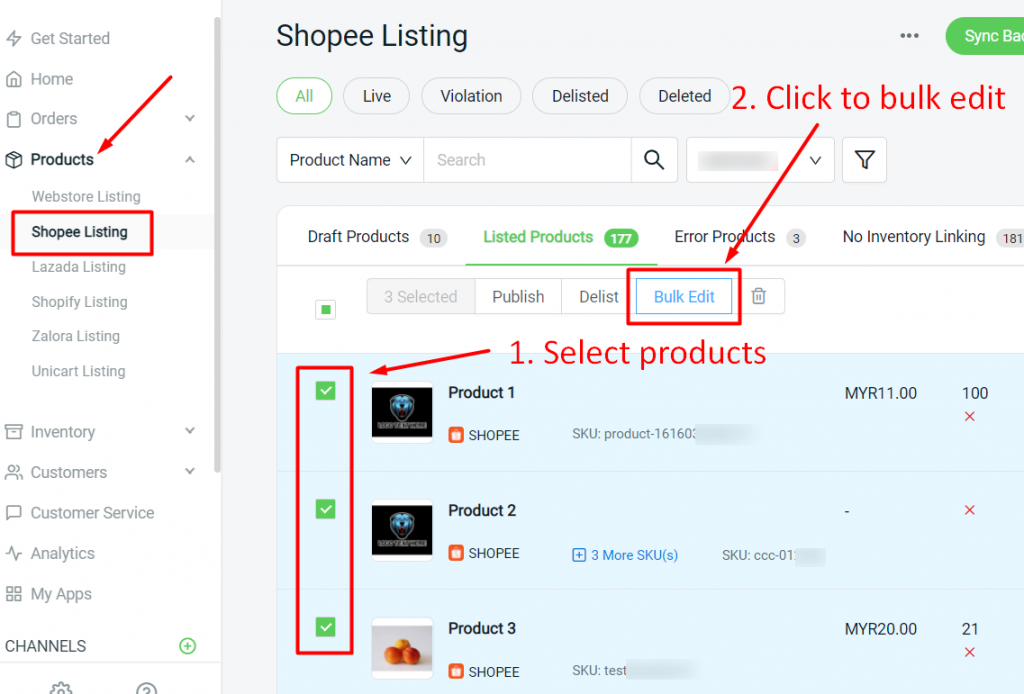
7. Shopee Bulk Edit
You may now bulk edit your Shopee product information and sync to Shopee under Shopee Listing > Select products > Bulk Edit.
1. The SiteGiant x Lalamove First Time 10% Top-Up Bonus Campaign (the “Promotion”) is provided by LALAMOVE MALAYSIA SDN BHD (COMPANY NO. 1277201-W) (“Lalamove”) and SiteGiant Sdn Bhd (“SiteGiant”). By participating in the Promotion by registering via this link: https://sitegiant.my/lalamove-integration and/or receiving the Bonus (as defined below), this indicates you understand and agree to be bound by these Terms.
2. You are eligible to participate in the Promotion and become an “Eligible Customer” if all of the following requirements are satisfied:
a. You have enrolled in the Promotion through the dedicated main landing page for the Promotion via this link: https://sitegiant.my/lalamove-integration (“the Form”) during the Promotion Period (as defined below);
b. You have become a registered corporate (prepaid settlement) account holder of Lalamove;
c. You have signed up as a new merchant of SiteGiant and you have been onboarded by SiteGiant following satisfaction of all requirements from SiteGiant during the Promotion Period;
d. You are a company incorporated in Malaysia with a valid business registration certificate; and
e. SiteGiant and Lalamove reserve the right to refuse any Eligible Customers their participation in the Promotion for any reason and without any prior notice.
3. If you are an Eligible Customer, you are eligible to a one-time fixed credit bonus equal to 10% of the amount first topped up, to be credited to your Lalamove corporate e-wallet account (the “Bonus”) if you successfully topped up at least RM 100 during at least one single transaction to your Lalamove corporate account (the “Transaction”).
4. This Promotion commences on 15th July 2022 with the end date to be announced at a later date (the “Promotion Period”).
5. If the Eligible Customer satisfies the Conditions in clause 3 of these Terms, the Bonus will be credited within 30 days immediately following the registration of your Lalamove corporate account.
6. The relevant top-up amounts in the Lalamove account have unlimited validity from the date of the successful top-up. The Bonus is subject to applicable agreements governing your Lalamove corporate account.
7. The relevant top-up amounts are not redeemable for cash or cash-out, for resale and no refund or exchange is permitted (except as required by applicable laws).
8. During the Promotion Period, in case of any fraud or abuse in respect to how the Bonus is awarded, Lalamove reserves the right to debit the Bonus from the Eligible Customer’s Lalamove corporate account without prior notice.
9. The Bonus cannot be earned in conjunction with other offers, packages or promotions as may be launched by Lalamove from time to time, unless specified by Lalamove. The Bonus cannot be transferred to third parties or other accounts, or exchanged for any other gifts, returned or exchanged for other products with respect to Lalamove.
10. SiteGiant and Lalamove reserve the right to amend, and/or vary any of these Terms and any arrangement of this Promotion, limit, suspend, cancel, and/or terminate the Promotion, without notice and without any liability.
c. By participating in the Promotion, you expressly consent that any personal information that you provide, may be shared between SiteGiant and Lalamove for purposes of the Promotion and all related administrative actions in connection therewith.
12. These Terms are governed by the law of Malaysia. In case of any dispute, SiteGiant and Lalamove reserve the right of final decision.
13. For any enquiries:
Related to SiteGiant, please contact support@sitegiant.my
Related to Lalamove, please contact partner.support@lalamove.com
Terms and Conditions
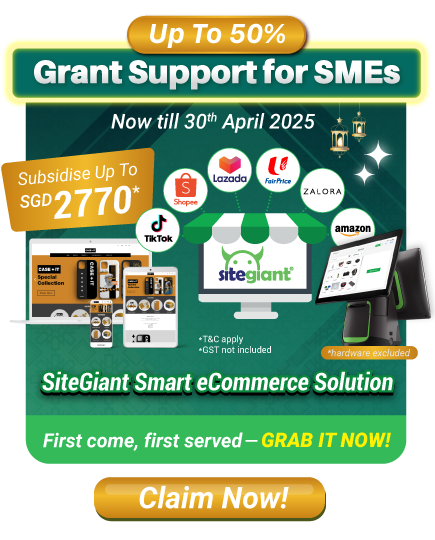
1. This promotion availability will be based on first come, first served basis. 2. This promotion is not applicable for renewal usage. 3. This promotion is valid for new signups only. 4. Duration of this free subscription offer is 3 + 12* months (*T&C apply). 5. Free 3 months subscription from SiteGiant and 12 months subscription from Government subsidy campaign (subject to availability). 6. SiteGiant reserves the right to change these terms and conditions at any time without prior notice.